Install tigervnc-server
dnf install tigervnc-server xorg-x11-fonts-Type1
Check if the selinux package was installed
dnf repoquery --requires tigervnc-server
dnf repoquery --requires tigervnc-server | grep selinux
dnf list installed | grep tigervnc-selinux
tigervnc-selinux.noarch      1.14.1-5.el9_6      @appstream
Read now to configure and start tigervnc on rocky-9.
less /usr/share/doc/tigervnc/HOWTO.md
# Limitations
You will not be able to start a TigerVNC server for a user who is
already logged into a graphical session. Avoid running the server as the
`root` user as it's not a safe thing to do. While running the server as
the `root` should work in general, it's not recommended to do so and
there might be some things which are not working properly.
Add a user mapping
emacs /etc/tigervnc/vncserver.users

:3=mihai
Configure Xvnc options
emacs /etc/tigervnc/vncserver-config-defaults

securitytypes=vncauth,tlsvnc
desktop=sandbox
alwaysshared
session=xfce

# Here are some tested geometries over LAN with a 4k monitor.
# Uncomment only 1 line.
# geometry=1920x1200     # 50 fps
# geometry=2560x1440     # 40 fps
# geometry=2560x1600     # 30 fps
# geometry=2880x1620     # 25 fps (good)
# geometry=3840x2160     # 16 fps
Set VNC password for the user
[mihai@centos: ~]$ vncpasswd
Start tigetvnc server
systemctl enable vncserver@:3
systemctl start  vncserver@:3
If the vncsession.pp policy is not loaded, the server will return this error
systemctl start vncserver@:3

Job for vncserver@:3.service failed because the control process exited with error code.
See "systemctl status vncserver@:3.service" and "journalctl -xe" for details.


journalctl -xe

-- Unit vncserver@:3.service has begun starting up.
Mar 14 16:51:25 centos-s-1vcpu-1gb-ams3-01 systemd[2154]: vncserver@:3.service: Failed to change SELinux context to system_u:system_r:vnc_session_t:s0: Operation not permitted
Mar 14 16:51:25 centos-s-1vcpu-1gb-ams3-01 systemd[2154]: vncserver@:3.service: Failed at step SELINUX_CONTEXT spawning /usr/libexec/vncsession-start: Operation not permitted
-- Subject: Process /usr/libexec/vncsession-start could not be executed
-- Defined-By: systemd
-- Support: https://support.oracle.com
-- The error number returned by this process is 1.
Mar 14 16:51:25 centos-s-1vcpu-1gb-ams3-01 systemd[1]: vncserver@:3.service: Control process exited, code=exited status=229
Mar 14 16:51:25 centos-s-1vcpu-1gb-ams3-01 systemd[1]: vncserver@:3.service: Failed with result 'exit-code'.
-- The unit vncserver@:3.service has entered the 'failed' state with result 'exit-code'.
Mar 14 16:51:25 centos-s-1vcpu-1gb-ams3-01 systemd[1]: Failed to start Remote desktop service (VNC).
-- Subject: Unit vncserver@:3.service has failed
-- Defined-By: systemd
-- Support: https://support.oracle.com
If the selinux context is not correct the server will return the following error
journalctl -xe

/SetroubleshootPrivileged.py[1364]: failed to retrieve rpm info for /var/lib/selinux/targeted/active/modules/400/vncsession
SELinux is preventing (on-start) from entrypoint access on the file /usr/libexec/vncsession-start.
For complete SELinux messages run: sealert -l 95553683-515b-405f-9b1a-1437e273df79

*****  Plugin restorecon (99.5 confidence) suggests   ************************

If you want to fix the label.
/usr/libexec/vncsession-start default label should be vnc_session_exec_t.
Then you can run restorecon.
The access attempt may have been stopped due to insufficient permissions to access a parent directory in which case try to change the following command accordingly.
Do
/sbin/restorecon -v /usr/libexec/vncsession-start
If you need to troubleshoot the selinux error, then let's first check the labels:
chcon -u system_u -t user_home_dir_t -v $HOME
chcon -u system_u -r object_r -t xdm_home_t -Rv $HOME/.vnc
Check tigervnc selinux policy module
dnf repoquery --list tigervnc-selinux.noarch
/usr/share/selinux/packages/targeted/vncsession.pp.bz2
Let's unpack the module and see the content
cd /tmp
cp /usr/share/selinux/packages/targeted/vncsession.pp.bz2 .
bzip2 -d vncsession.pp.bz2
semodule_unpackage vncsession.pp vncsession.mod
sedismod vncsession.mod

play with the menu: (m for the menu)
Read here about loading and unloading policies.
sestatus | grep Loaded
Loaded policy name:             targeted

semodule -l
semodule -l | grep vncsession
If vncsession.pp policy is not loaded then:
The command semodule -i
The .pp.bz2 extension indicates a policy package (pp) that has been compressed with bzip2.
cd /usr/share/selinux/packages/targeted
chmod 644 vncsession.pp.bz2
semodule -i vncsession.pp.bz2

libsemanage.semanage_direct_install_info: Overriding vncsession module at lower priority 200 with module at priority 400.
VNC connection is not encrypted. We must use an ssh tunnel.
firewall-cmd --zone=public --list-all
firewall-cmd --zone=public --add-service=ssh --permanent   # add ssh if not added before
firewall-cmd --add-port=5903/tcp --permanent               # vncserver@:3
firewall-cmd --reload
If you do this on a headless server then install X11, XFCE and lightdm as on
Rocky-9.
You have to start XFCE once for the <USER> to create the default desktop.
It may be needed to reboot the server once.
Download the VNC viewer for Linux from realvnc website and install it to /opt
su
mkdir -pv /opt/vnc-viewer
mv VNC-Viewer-*-Linux-x64 /opt/vnc-viewer/
cp -v /home/mihai/Code/git-main/script/realvnc/vnc-viewer.png /opt/vnc-viewer
chown -Rv root:root /opt/vnc-viewer
chcon -Rv -u system_u -t usr_t /opt/vnc-viewer
cat > /usr/share/applications/realvnc.desktop << EOF
[Desktop Entry]
Name=RealVNC
GenericName=VNC Viewer
Comment=Control remote computer
Exec=/opt/vnc-viewer/VNC-Viewer-6.19.1115-Linux-x64
Terminal=false
Icon=/opt/vnc-viewer/vnc-viewer.png
Type=Application
Categories=Network;
Version=1.0
X-Desktop-File-Install-Version=0.23
EOF
Create the ssh tunnel
ssh -L 5903:$DIGITALOCEAN:5903 -l mihai $DIGITALOCEAN
or connect using a private key
ssh -L 5903:$DIGITALOCEAN:5903 -i ~/.ssh/id_rsa_digitalocean -l mihai $DIGITALOCEAN
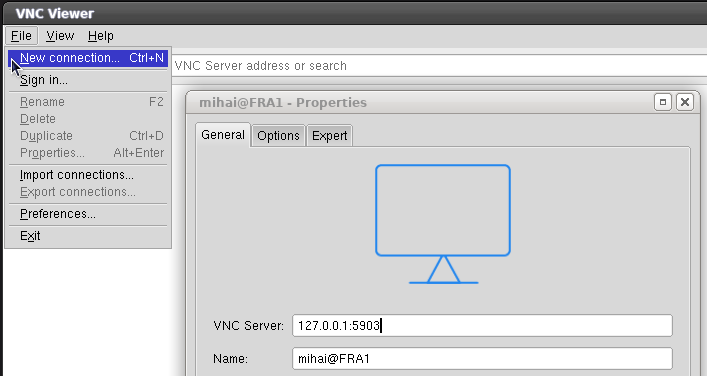
Start RealVNC
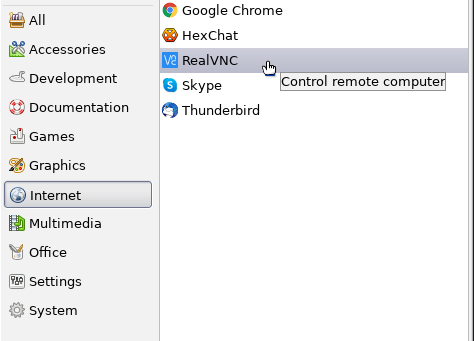
Add a new connection
To connect from a Windows client read
here
about How to Tunnel VNC over SSH.
You will need
PuTTY and
RealVNC for this.
PUTTYGEN -> Menu -> Conversions -> Import key -> Save private key with .ppk extension.
See which VNC port is currently open
nmap localhost
PORT     STATE SERVICE
22/tcp   open  ssh
25/tcp   open  smtp
5903/tcp open  vnc-3
6003/tcp open  X11:3